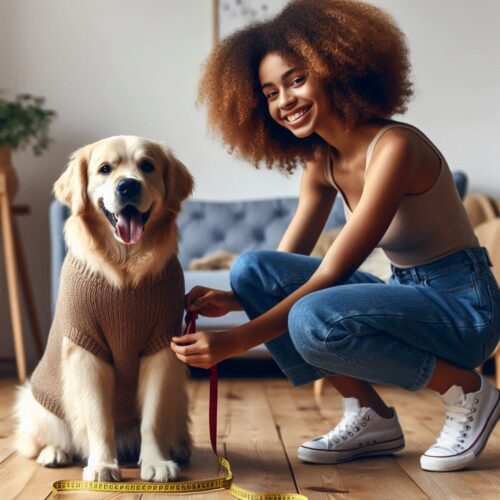
Knitting items for pets can be a lot of fun and a unique way to show some love. But, just diving into it without understanding your pet’s measurements? That’s a recipe for disaster. Getting those measurements right means making sure your knitted item will fit like a glove. Making sure your pet is comfortable and looking fabulous is the ultimate goal.
First things first, let’s talk about why you need those measurements. Unlike human clothes, pet knitted items need to accommodate all those movements our furry friends make. Every roll, stretch, and jump should be unhindered. That’s where accurate measurements come in handy. You don’t want them feeling restricted or, even worse, wiggling right out of their new sweater.
Measurements you’ll need cover a few key spots: the neck, the chest (right behind their front legs), and the length from their collar to the base of their tail. Don’t miss the girth – that’s the widest part around their chest. These are the core areas for most knitted pieces like sweaters or vests and will help ensure a snug yet comfy fit.
Let’s talk tools. You don’t need anything fancy; a flexible tape measure will do the trick. If you have a wiggler, some treats to keep them still might help too. A notepad to jot down those numbers isn’t a bad idea either. Keep it all simple and straightforward.
Step-by-Step Guide to Measuring Your Pet
Making sure your pet is ready for their measuring session can save a lot of time and fuss. A calm, relaxed pet is way easier to measure than one that’s bouncing around. Pick a time when they’re likely to be chill – maybe after a meal or a good play session. Keep those treats handy too; they can work wonders to keep your furry model in place.
Now, let’s get into the specifics. Measuring the neck is usually the first step. Wrap your flexible tape measure around the base of your pet’s neck, where a collar would normally sit. Don’t pull it too tight; you want to leave space for comfort. A good rule of thumb is to leave enough room to slip two fingers under the tape.
Next up is the chest. This is the part right behind their front legs, essentially the widest part of their body. Wrap the tape around their chest and make sure it’s level all the way around. Again, avoid pulling too tight; your pet should be able to move comfortably.
When it comes to measuring length, start at the base of the neck (right where the collar sits) and go all the way to the base of the tail. Make sure your pet is standing up straight for this one; you want to get an accurate read of their full length. Double-check your measurement to be sure you’ve got it right.
Accuracy is key. If your pet can’t stay still, get someone to help hold them steady. And always write down your measurements immediately to avoid forgetting them. Measuring twice to confirm you’ve got the right numbers can save you from a lot of headaches later on.
Using Measurements to Create Perfect Knitted Items
Once you have those measurements, it’s time to bring your vision to life. Start by choosing patterns that match your pet’s dimensions. Many knitting patterns will specify measurements, so find one that’s close to what you’ve noted down. If the pattern is slightly off, don’t worry – you can make adjustments.
Adjusting a pattern isn’t as complicated as it might sound. For example, if the pattern calls for a smaller chest measurement than your pet’s, simply adding a few extra stitches can do the trick. Likewise, shortening the length is just a matter of reducing the number of rows. The key is to always check how changes might impact other parts of the pattern.
While knitting, keep those measurements handy. It’s easy to get carried away and lose track, so frequent checks can keep things on track. Use stitch markers and a row counter to help manage adjustments. Plus, knitting a small sample swatch first can help ensure your gauge matches the pattern, preventing any unwelcome surprises.
Avoid common mistakes by staying patient and taking your time. Rushing through can lead to errors that are frustrating to fix later. If you’re unfamiliar with adjusting patterns, there are plenty of online tutorials and knitting communities that offer great advice and tips. Don’t hesitate to reach out for help if you need it.
Crafting a knitted piece that fits your pet perfectly not only makes them look adorable but also keeps them comfortable. Attention to detail ensures your hard work pays off, turning each piece into a personal and practical item your pet will love.


This article on measuring pets for knitted items is incredibly informative! I love how you break down each step and emphasize the importance of accurate measurements for a perfect fit. It’s clear that getting these details right can make a big difference in comfort and functionality for our furry friends.
I’m curious, though—are there any tips for handling different types of pet coats or sizes that might not fit the standard measurements? For example, what about pets with particularly fluffy or short fur? Any additional advice on adjusting measurements for these unique cases would be fantastic!
Thank you for the kind words! I’m glad you found the article informative. When it comes to pets with particularly fluffy or short fur, adjusting measurements can indeed make a difference. For fluffy pets, it’s helpful to gently compress the fur when measuring to ensure a snug fit without being too tight. On the other hand, for pets with short fur, you might want to add a bit of extra ease to the measurements to avoid the item being too tight against their skin. Additionally, for pets that don’t fit standard measurements, focusing on key areas like the chest, neck, and back length will allow for better customization. These small adjustments can really help in creating a comfortable and functional knit for your furry friend!